Your store information is used in many places throughout your website, learn what is needed and where to enter it.
Store Name, Logo, Inquiries & Hours
Store Name, Logo, Inquiries & Hours
- To begin, navigate in Admin to Settings > Website > Store Information.
- In the General Information section, enter your store's name in the "Store Name" field.
- Upload a logo by clicking on the yellow up arrow icon.
- We recommend using a horizontal logo as they tend to look better on most templates.
- Keeping the logo clean and simple (no phone number or small print) will help it look good across all devices.
- Remember that more than half of your site visitors are looking at your site from their mobile phones.
- Enter the phone number and email address you would like to be associated with general inquiries.
- The General Inquiries form section is set to "NO FORM SELECTED" by default, but you also have the option of directing general inquiries to a form that you create.
- Input your store's hours of operation.

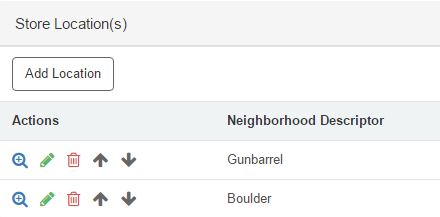
Store Location(s)
- To add a Store Location, click Add Location and fill in the appropriate information.
- The Neighborhood Descriptor can be the city in which the store is located, the shopping center, or the street intersection.
- Use words that can readily identify the area.
- If each location has different hours, post the hours for this location here.
- Click Submit Changes and repeat this process for each additional store location.
- The Neighborhood Descriptor will be displayed in the Header, and detailed information about each store location will be displayed on the Contact Us page.
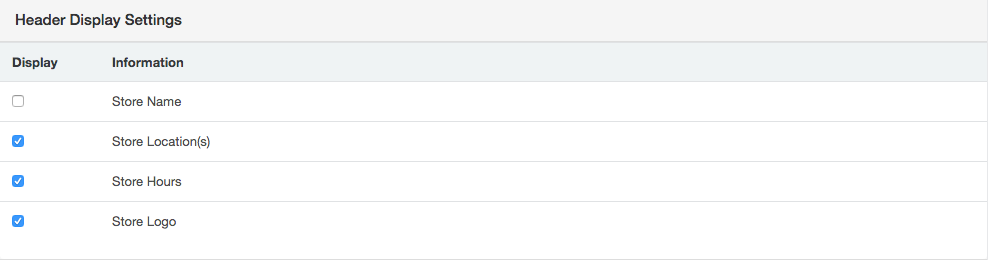
Header Display Settings
- Select which information you would like displayed in the header by checking the boxes.
- Publish changes (Website > Publish Changes) and check your website to ensure you like how everything looks.