Instructions to download, install, and configure the Square Integrator to connect your Square POS inventory to your website.
Square Integrator Prerequisites Install
Square Integrator Prerequisites Install
Download the Square Integrator Application Here
- Click the link above to download the Setup file. This application can be installed on any Windows computer (Windows XP, Vista, 7, 10, and 11) that has an internet connection.
NOTE: If your browser presents a warning notice when attempting to download the application, it is safe to continue past the warning as some browsers will flag the file type as potentially unsafe.
- If prompted, select Yes to allow the program to make changes to the computer.
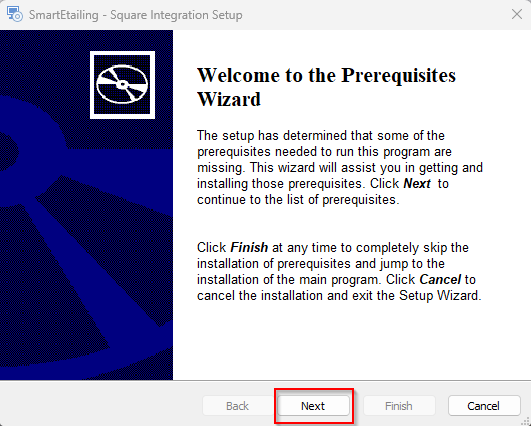
- Once the Prerequisites Wizard window appears, click Next.
- Click Next to install the Prerequisites.
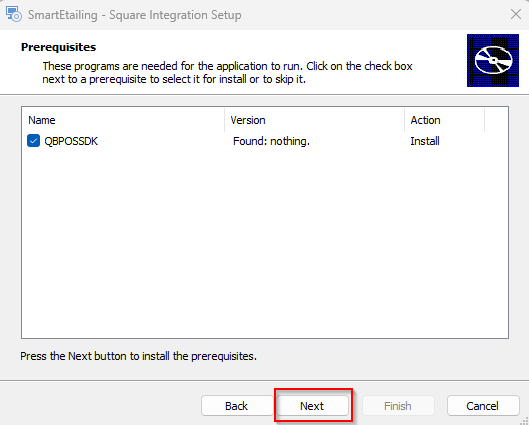
- Keep clicking Next to continue through the Prerequisite prompts.
- Click Install for the Prerequisites to be installed.
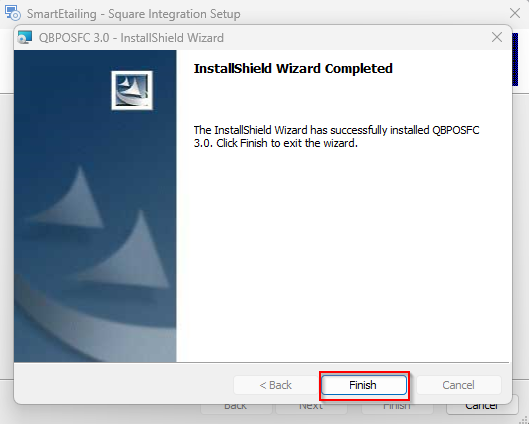
- Click Finish when prompted.
Square Integrator Install
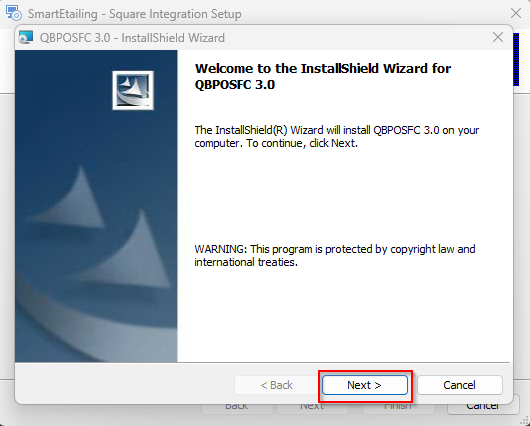
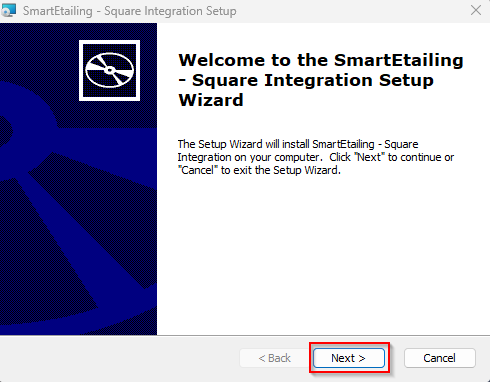
- Once the Square Integration Setup Wizard window appears, click Next.
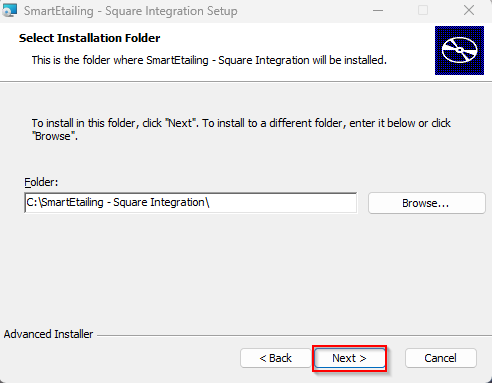
- Click Next through the prompts.
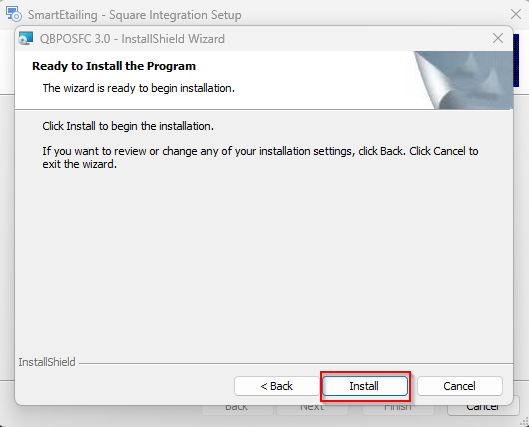
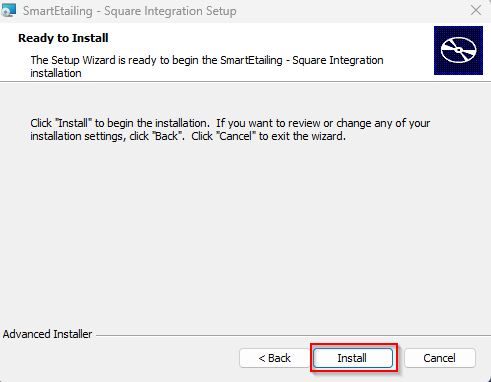
- Click Install for the program to be installed.
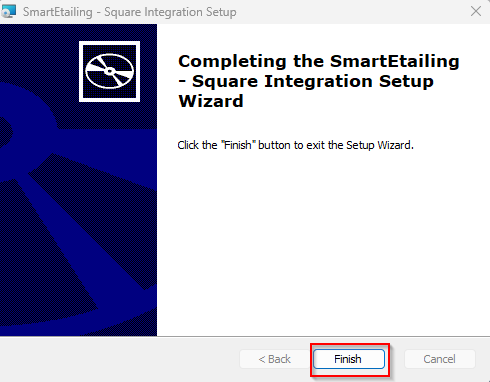
- Click Finish when prompted.
Setup
- Double-click the Square Export desktop shortcut to start the application.
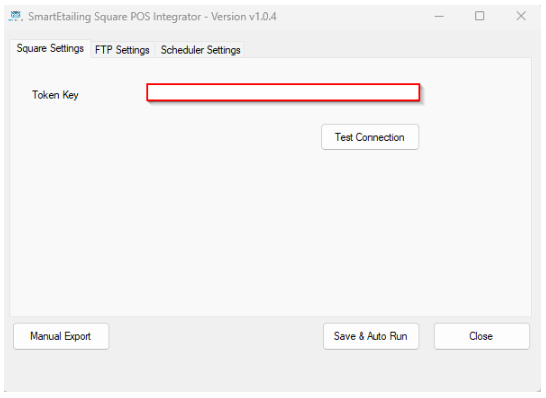
Square Settings
- Click on the Square Settings tab and you'll see a Token Key needs to be entered.
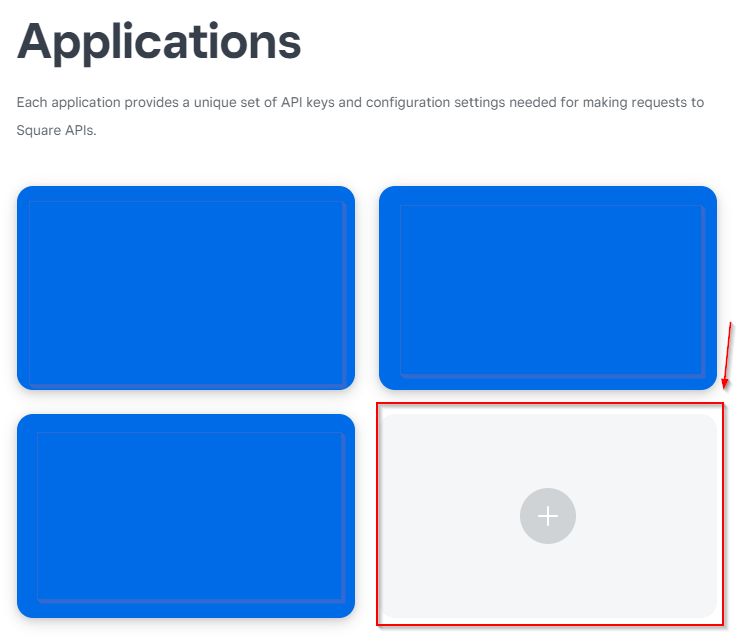
- To obtain the Token Key log into your Square account and navigate to this link: https://developer.squareup.com/apps
- Press the gray "+" button under Applications.
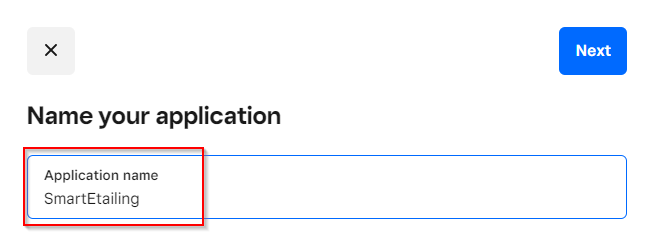
- In the pop-up window enter "SmartEtailing" for the Application Name and click Next.
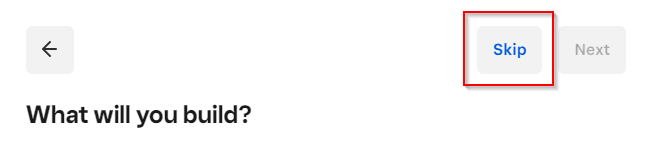
- If prompted for the build or audience type, press the Skip button.
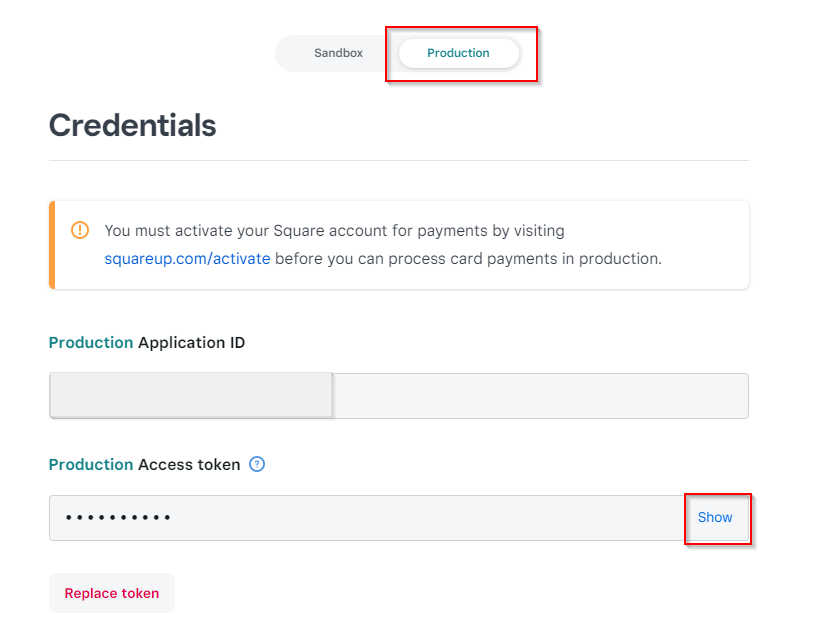
- On the Credentials page select the "Production" tab.
- Click Show to view the Production Access Token.
-
- Copy the token.
- Navigate back to the Square Integrator to paste the token into the Token Key field.
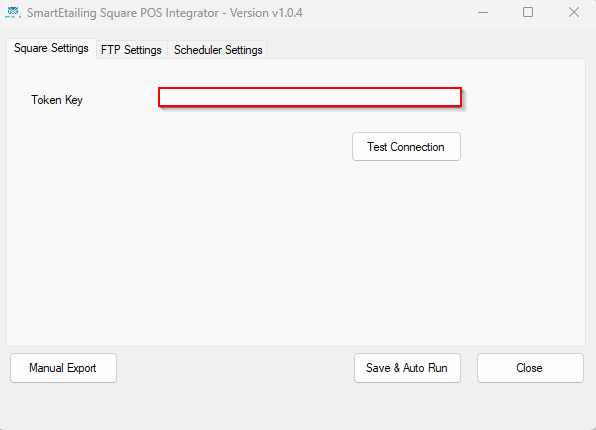
- Click the Test Connection button to confirm the connection is successful.
- Then click Save & Auto Run to save the changes.
FTP Settings
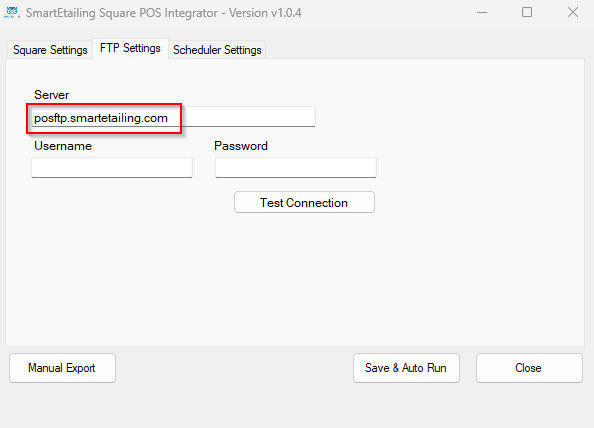
- Click on the FTP Settings tab.
- In the Server field enter "posftp.smartetailing.com".
- To obtain your Username, log into Admin and navigate to Settings > POS Sync > POS Sync Settings.
- Note the FTP Account Username and enter that in the Username field in the integrator program.
- For the Password, click "Generate New FTP Password" in Admin (on the same POS Sync Settings page) and it will be sent to the tech contact on file.
- Obtain that password and enter it into the Password field in the integrator program.
- Click Test Connection to confirm the connection is successful.
- Then click "Save & Auto Run" to save the changes.
NOTE: If copying and pasting the FTP password, be sure to not copy a space before or after the password. If you do not receive the password email contact the Client Success team for further assistance.
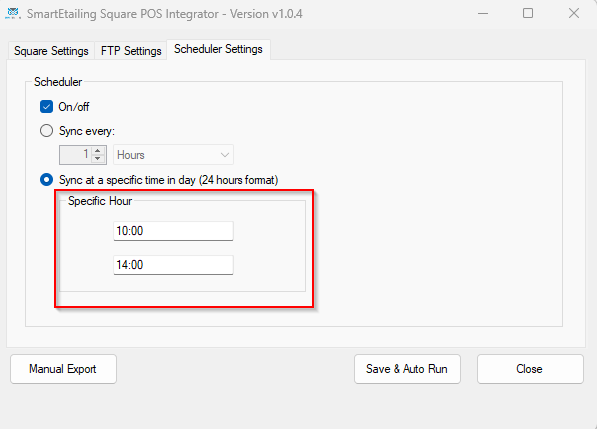
Scheduler Settings
- Click the Scheduler Settings tab and then click the "On/Off" box to enable the scheduler.
- Select the appropriate sync bubble box and enter your selection for how often to send us a POS file.
- Schedule the POS file to be sent to us at least once a day.
The computer that the Square Integrator is installed on needs to be on with the program running in order for a file to be generated and sent to us.
-
If selecting "Sync at a specific time in day"
- Up to two different times can be entered, one in each box.
- Both boxes do not need to be filled out.
- Enter the times in the military/24-hour time format. For example, if wanting to have a pos file sent to us at both 10 a.m. and 2 p.m., enter 10:00 and 14:00 into the boxes.
-
- Click the Save & Auto Run button to save the changes.
- Press the Manual Export button to have a POS file generated and sent to us right away. A status bar will appear below the button with the progress of the upload.
Setting the Program to Automatically Start on Startup
- This guide can be followed to toggle on/off programs that launch automatically on startup.
- If we are not on the list of programs, then follow the steps in this guide:
- Copy program shortcut from desktop.
- Windows Key + R, type: shell:startup then select OK.
- Paste the program shortcut to this folder.
- Restart computer.
- Search Startup Apps.
- Toggle on the Square POS Integrator.
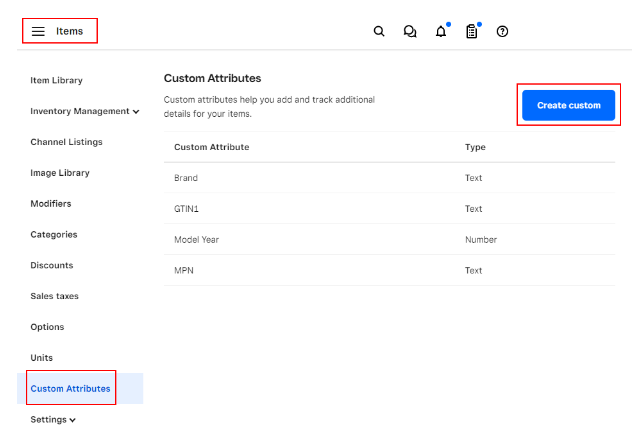
Part Number Fields
- By default, a GTIN field exists in Square and the UPC / GTIN should be entered in this field within the details of each product.
- To add additional fields in Square navigate to Items > Custom Attributes then press the "Create Custom Attribute button". Additional fields that can be created:
- MPN
- GTIN1
- Brand
- Select the "Text" attribute type when creating additional fields.
- Once created, additional fields will now appear within each product in Square and can be filled out to be utilized by our platform.
- Our system uses UPC (GTIN) or part numbers to map items. If the part number fields are not filled out then the item cannot map. The GTIN field is preferred to be filled out. The MPN or GTIN1 custom fields listed above can also be filled out.
- GTIN in Square = GTIN1 on our platform.
- MPN in Square = MPN on our platform.
- GTIN1 in Square = GTIN2 on our platform.
- The SKU field in Square is a system-generated number for each item. This field is required to be filled out but is not used for product mapping.
- SKU in Square = My SKU on our platform.
NOTE: Please contact the Client Success team if further assistance is needed.
Discounts and Purchase Order information that is entered in Square will not come over to our platform.